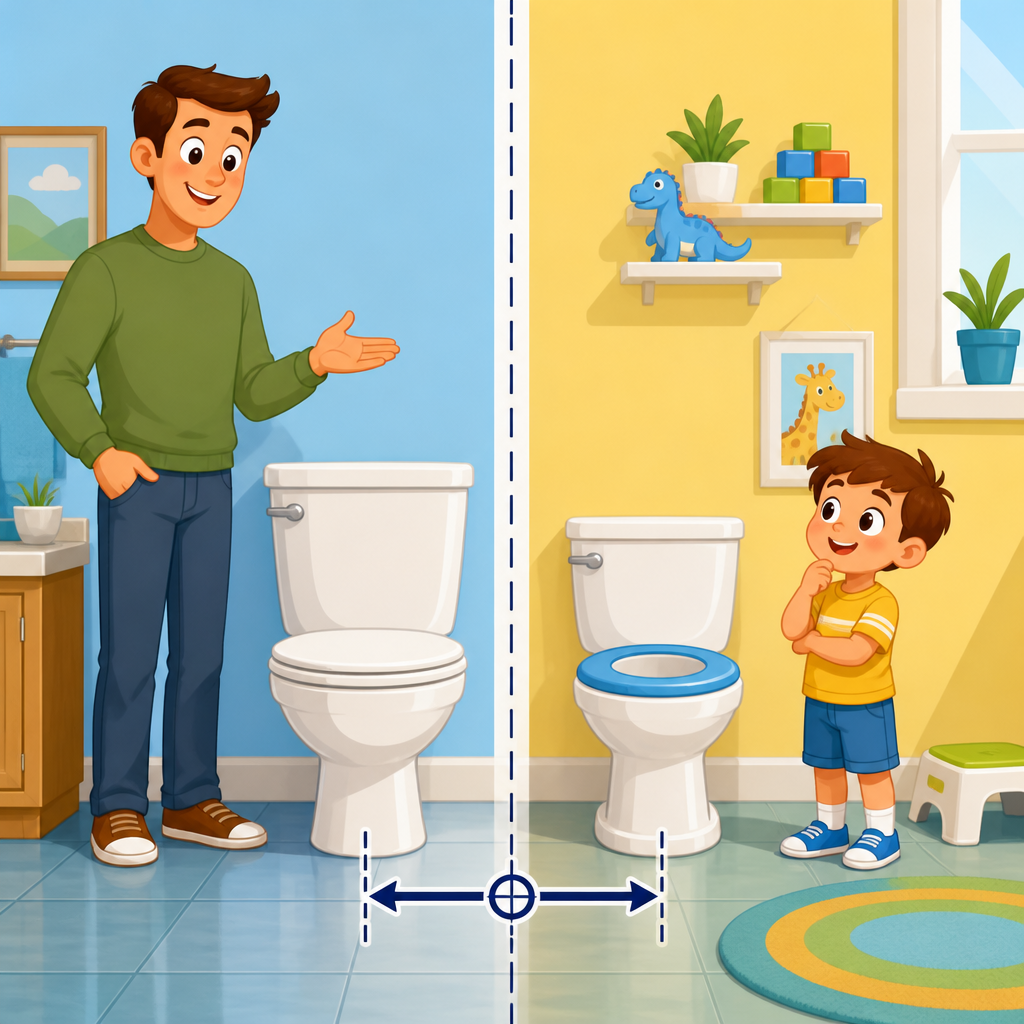
Water closet centerline requirements govern one of the most important dimensions in accessible restroom design: the horizontal distance from the side wall or partition to the centerline of the toilet. In adult accessible compartments, that centerline is typically set at 16 to 18 inches from the side wall, a narrow tolerance that directly affects lateral transfers, grab bar reach, clear floor space, and real usability. In children’s facilities, the required range changes because body size, reach, and transfer mechanics are different. I have reviewed restroom plans where a toilet was only one inch off centerline and the entire compartment had to be rebuilt, which shows how small dimensional errors become expensive compliance failures.
For architects, contractors, facility managers, school administrators, and owners, understanding water closet centerline requirements is not just about passing inspection. It is about creating restrooms that people can use safely and independently. This Restrooms & Plumbing hub explains the adult 16 to 18 inch rule, the children’s dimensional ranges, and the related requirements that determine whether a restroom actually works in practice. It also connects centerline placement to grab bars, toilet paper dispensers, clearances, seat height, flush controls, and common construction mistakes so this page can serve as the starting point for every accessible restroom planning decision.
What water closet centerline means in accessible restroom design
The water closet centerline is measured from the finished side wall or finished partition surface to the center of the toilet fixture. That wording matters. Inspectors do not measure from framing, backing, or rough plumbing marks; they measure from the final installed surface. In a compartment with tile, wall panels, or masonry fur-outs, that finished dimension can shift enough to create noncompliance if the rough-in was not coordinated early. In practice, I always verify the centerline again after finishes are installed because assumptions made during layout often fail once actual wall thickness changes.
This dimension matters because accessible toilet use depends on predictable transfer space. A person using a wheelchair may approach, lock brakes, and transfer laterally to the seat while using the side grab bar and rear grab bar for support. If the toilet is too close to the side wall, the user may have inadequate body positioning room. If it is too far away, the grab bars become less effective and the transfer gap widens. The centerline therefore works with compartment width and grab bar location as a coordinated system, not as an isolated number.
Within the larger ADA Accessibility Standards topic, Restrooms & Plumbing includes more than water closets alone. This hub also points conceptually to lavatories, urinals, turning space, dispensers, mirrors, drinking fountains, clear floor spaces, protruding objects, pipe protection, and family or assisted-use toilet rooms. If you treat the centerline rule as a stand-alone checklist item, you miss how restroom accessibility succeeds or fails through dimensional relationships. The best accessible restrooms are designed as systems where each measurement reinforces independent use.
The adult standard: why 16 to 18 inches from the side wall is required
For adult accessible water closets, the centerline must be 16 to 18 inches from the side wall or partition in standard accessible compartments and toilet rooms. This is the dimension most designers know, and it is one of the most consistently enforced because it is simple to verify in the field. The allowed range is tight by design. A centered toilet in this band positions the user close enough to the side grab bar for leverage while preserving enough lateral space for transfer.
The practical reason for the 16 to 18 inch range is ergonomics. A side transfer works best when the wheelchair can align beside the toilet and the user can shift across with limited horizontal distance. The side wall anchors the grab bar, and the toilet centerline must keep the bar within a usable reach band. In real installations, 17 inches is often used as the target because it gives one inch of tolerance on either side during field verification. That does not change the legal range, but it is a common quality-control strategy.
Adult centerline placement also affects other required elements. Rear and side grab bars must be located relative to the water closet, flush controls need to be on the open side in many compliant layouts, and toilet paper dispensers must be mounted within a defined reach zone that assumes the toilet is properly positioned. When the centerline drifts, these secondary measurements drift too. One wrong rough-in can cascade into multiple violations, which is why experienced plumbing contractors coordinate shop drawings with accessibility details before wall close-up.
Children’s water closet centerline dimensions and when they apply
Children’s accessible restrooms use different centerline ranges because children are not scaled-down adults. For facilities primarily serving children ages 3 through 12, the applicable accessibility standards provide age-based dimensions. For children ages 3 through 4, the water closet centerline is 12 inches from the side wall. For ages 5 through 8, it is 12 to 15 inches. For ages 9 through 12, it is 15 to 18 inches. Those ranges align with child body size, arm reach, and transfer positioning rather than adult anthropometrics.
These dimensions usually apply in elementary schools, early learning centers, pediatric healthcare settings, childcare facilities, museums, and recreation buildings where toilet rooms are designed specifically for children. The key phrase is designed for children’s use. In mixed-use buildings, adult dimensions may still be required in some rooms, especially where adults, staff, caregivers, or visitors also rely on the accessible fixture. I have seen schools install child-height toilets but retain adult transfer geometry in selected toilet rooms because staff and visiting adults needed equivalent access.
Choosing the correct children’s range requires more than checking a box on a schedule. Designers need to confirm the intended user group, fixture height, grab bar mounting heights, and compartment proportions together. A child-centered toilet placed at an adult centerline can make grab bars awkwardly distant. Conversely, a child centerline in a restroom intended for older students can feel cramped and reduce usability. Matching age range to actual occupants is the critical compliance and usability decision.
How adult and children’s dimensions compare in practice
Although the adult rule of 16 to 18 inches sounds close to the older children’s range of 15 to 18 inches, the design intent differs. Adult layouts assume adult-sized wheelchairs, adult torso width, and adult reach to horizontal grab bars. Children’s layouts must support shorter arm reach, lower seat heights, and different caregiver interaction patterns. In a pediatric clinic, for example, I have seen staff request slightly larger adjacent maneuvering zones even when the centerline complied, because parents or aides often assist younger users.
The comparison becomes more important during renovations. Many older schools have toilet rooms built around standard adult rough-ins, commonly 15 inches from wall to center. That rough-in may work for conventional toilets in nonaccessible rooms, but it often fails current accessible requirements for adults and may not match the intended children’s age bracket either. Renovation teams should not assume an existing rough-in can remain. Verifying actual centerline, seat height, and grab bar geometry early prevents costly change orders after partitions and tile are installed.
| User group | Water closet centerline from side wall | Primary design reason |
|---|---|---|
| Adults | 16 to 18 inches | Supports lateral transfer and side grab bar reach |
| Children ages 3–4 | 12 inches | Matches very small body size and reduced reach |
| Children ages 5–8 | 12 to 15 inches | Balances transfer support with growing reach and width |
| Children ages 9–12 | 15 to 18 inches | Bridges child and near-adult transfer geometry |
The table highlights a simple truth: centerline dimensions are not interchangeable. A restroom can look visually acceptable and still be poorly fitted to its users. When selecting dimensions, the correct question is not “What rough-in do we usually use?” but “Who must use this room independently, and what geometry supports that use?” That is the standard approach in accessible restroom planning.
Related restroom and plumbing requirements that affect centerline compliance
Water closet centerline requirements cannot be separated from surrounding restroom and plumbing criteria. The clear floor space around the toilet, turning space within the room, and door maneuvering clearances determine whether a user can approach the fixture at all. Seat height affects transfer difficulty, especially where a user shifts from a wheelchair of similar height. Grab bars must be mounted at prescribed heights and lengths, and they must be anchored to withstand loads. A perfectly placed toilet is still unusable if the side grab bar is too short or improperly located.
Plumbing fixture selection also matters. Elongated bowls are common in adult accessible installations because they can support transfer positioning more predictably. Flush controls should be operable with one hand and without tight grasping, pinching, or twisting of the wrist. In many accessible layouts, the flush control belongs on the open side of the water closet to reduce reach across the body. Toilet paper dispensers must be placed where they are reachable without requiring extreme leaning or obstructing grab bar use.
As this Restrooms & Plumbing hub, the page should also frame adjacent subtopics that teams regularly coordinate with water closets: lavatory knee clearance, insulated drain and supply pipes, mirror mounting heights, urinal rim and flush control heights, baby changing station clearances, shower compartments, and drinking fountain access. Experienced reviewers know accessibility failures often occur at these intersections. A compliant toilet compartment next to an inaccessible lavatory still leaves the restroom functionally incomplete.
Common design, rough-in, and inspection mistakes
The most common mistake is confusing the plumbing rough-in dimension with the required finished centerline. Many plumbers are accustomed to a nominal rough-in and may assume it automatically produces compliance. It does not. Wall tile, resilient panels, masonry furring, or thicker partitions can push the finished face inward, reducing the measured centerline. Another common mistake is measuring from the wrong side, especially in partitioned compartments where the inspector measures from the finished partition surface, not a layout line on the slab.
Design documentation can also create errors. I routinely see toilet plans that call out accessible grab bars but omit a clear centerline dimension. That leaves the fixture location to interpretation in the field. Best practice is to dimension from finished face to centerline directly on enlarged restroom plans and interior elevations, then reinforce it in plumbing schedules or accessibility notes. Coordination between architectural and plumbing sheets is essential because one discipline may otherwise override the other with standard details.
Inspection failures often involve compounded deviations. For example, a toilet might be installed at 15 inches from the wall in an adult accessible stall, the side grab bar may be shifted to match the misplaced fixture, and the dispenser may then be mounted relative to the shifted grab bar. Each decision seems logical in isolation, but together they create a noncompliant compartment. Field verification with a tape measure before final anchorage is the easiest way to prevent these cascading errors.
Best practices for schools, healthcare, and commercial projects
In schools, the safest approach is to decide early which restrooms are intended for which age groups and document that intent clearly. If a building serves multiple grades, do not assume one children’s dimension works everywhere. Elementary campuses often need a mix of child-centered toilet rooms and adult-accessible staff or public restrooms. In healthcare projects, consider caregiver presence, exam-room adjacencies, and whether bariatric or family-assist toilet rooms are also needed. Accessibility planning is strongest when centered on real use patterns rather than generic code summaries.
For commercial buildings, consistency and field quality control matter most. Standardize accessible toilet room details, use enlarged plans, and require mock-up verification for repetitive restrooms in hotels, offices, airports, or retail centers. On renovation projects, laser measurement of existing partitions and plumbing locations can reveal whether a nominally simple fixture replacement will actually trigger partition relocation. Facility managers should also keep as-built restroom dimension records because maintenance teams frequently replace fixtures years later without realizing that a few inches can affect compliance.
The central lesson across Restrooms & Plumbing is that accessible design succeeds when dimensions are coordinated, verified, and built for the actual user group. Water closet centerline requirements are the anchor point, but they are only one part of a functioning restroom. Use this hub as the starting point for every related topic, from grab bars and dispensers to lavatories and turning space. If you are planning, renovating, or auditing a restroom, measure the centerline first, confirm the user population next, and then review every related clearance with the same precision.
Frequently Asked Questions
What does “water closet centerline” mean, and why is the 16–18 inch dimension so important in accessible design?
The water closet centerline is the horizontal measurement from the finished side wall or partition to the exact center of the toilet fixture. In adult accessible toilet compartments, this dimension is typically required to fall between 16 and 18 inches. That narrow range is not arbitrary. It is what helps position the user close enough to the side grab bar for support while also preserving the clearances needed for safe transfer onto and off of the toilet.
When the centerline is placed correctly, the entire accessible layout works together as intended. The toilet is close enough to the wall to support side transfers, but not so close that the user’s body or mobility device is cramped. Grab bars become easier to reach, the clear floor space beside the fixture remains usable, and the overall compartment supports real-world mobility rather than just technical compliance on paper. A centerline that is even slightly off can affect comfort, safety, and usability for wheelchair users and others who rely on precise spatial relationships inside the stall.
In practical terms, this dimension is one of the foundational measurements in restroom accessibility. It influences fixture placement, partition layout, grab bar coordination, and user independence. That is why designers, inspectors, and contractors pay close attention to it during both plan review and field installation.
Why is the adult accessible water closet centerline usually required to be 16–18 inches from the side wall?
The 16–18 inch range exists because accessible restroom design depends on balancing support, reach, and transfer space. For many users, especially wheelchair users, the side wall and its grab bar are essential during a lateral transfer. If the toilet is too far from the wall, the grab bar may be difficult to reach effectively, and the transfer distance becomes greater and less safe. If the toilet is too close, the user may not have enough body clearance or room to position properly during the transfer.
This range also supports consistency. Accessible design works best when users can expect similar spatial relationships from one restroom to another. A toilet centerline set within the required range helps create predictable conditions, which is especially important for people who navigate spaces using practiced movements and body positioning. Small dimensional changes can have outsized effects in a compact restroom compartment.
Another important reason is coordination with the rest of the accessible stall. The toilet location interacts with the rear and side grab bars, the minimum compartment width, and the clear floor area needed beside the fixture. The 16–18 inch centerline is not an isolated rule; it is part of a system. When it is respected, the restroom is more likely to function as intended for a wide range of users rather than simply appearing accessible.
How do children’s water closet centerline requirements differ from adult dimensions?
Children’s accessible toilet compartments use different dimensions because children have smaller body sizes, shorter reach ranges, and different transfer and support needs than adults. While adult compartments commonly use a 16–18 inch centerline from the side wall, children’s facilities are typically designed with a reduced centerline range that better reflects pediatric use. The purpose is the same as in adult design: to align the toilet with usable grab bar access, maintain appropriate side positioning, and create a stall that children can actually use safely and independently.
The key point is that accessible design is not one-size-fits-all. A dimension that works for adults may place a fixture too far from the wall for a child to reach support comfortably, or it may create a transfer relationship that does not match a child’s size and mobility pattern. That is why children’s requirements modify the centerline and often coordinate with other scaled elements such as seat height, grab bar height, and accessory placement.
Designers should always verify which code or accessibility standard applies to the project, because children’s provisions must be used intentionally and only where appropriate. In schools, childcare facilities, pediatric healthcare environments, or other spaces designed specifically for children, using the correct child-based dimensions helps ensure that the restroom is not just technically labeled accessible but genuinely functional for the intended users.
What happens if the toilet centerline is outside the required range?
If the toilet centerline falls outside the required range, the restroom may fail accessibility compliance and, more importantly, may become difficult or unsafe to use. A centerline that is too far from the side wall can reduce the effectiveness of the grab bar and make lateral transfer more challenging. Users may need to stretch farther, shift more awkwardly, or rely on unstable movement patterns. That can increase the risk of falls or reduce independence.
If the centerline is too close to the wall, different problems can occur. The user may not have enough side clearance to position properly, clothing adjustment can become more difficult, and body movement may feel constrained. Even though the difference might seem minor on a drawing, in a tight accessible compartment a small placement error can change how the entire space performs.
There are also project consequences beyond usability. Noncompliant installation can trigger failed inspections, punch-list corrections, added labor, schedule delays, and possible legal exposure if the finished restroom does not meet applicable accessibility requirements. Because toilets are tied into plumbing rough-ins, correcting an error after installation can be costly. That is why centerline dimensions should be checked carefully during design, layout, rough-in, and final fixture placement rather than waiting until the end of the job.
How can designers and contractors make sure they get water closet centerline dimensions right in both adult and children’s restrooms?
The best approach is to treat the centerline as a critical control dimension from the very beginning of the project. During design, confirm whether the restroom is intended for adults, children, or a specific occupancy that triggers child-based accessibility provisions. Then coordinate the toilet location with the applicable standard, the stall width, the grab bar layout, the clear floor space, and any other fixture or partition constraints. The centerline should never be selected in isolation.
During construction, accuracy depends heavily on early layout. The plumbing rough-in should be located using finished dimensions, not just framing assumptions. Teams should account for wall finishes, partition thickness, and any field conditions that could shift the final relationship between the toilet and the side wall. A common mistake is measuring from the wrong reference point or failing to account for the finished wall surface, which can push the installed centerline out of tolerance even if the rough work looked close enough.
Final verification is equally important. Before sign-off, measure from the finished side wall or partition to the actual center of the installed toilet. Confirm that the result aligns with the applicable adult or children’s requirement and that the grab bars and clearances still work as a complete accessible system. In short, getting the centerline right requires careful code review, precise layout, and field measurement. When those steps are followed, the restroom is far more likely to be both compliant and genuinely usable.