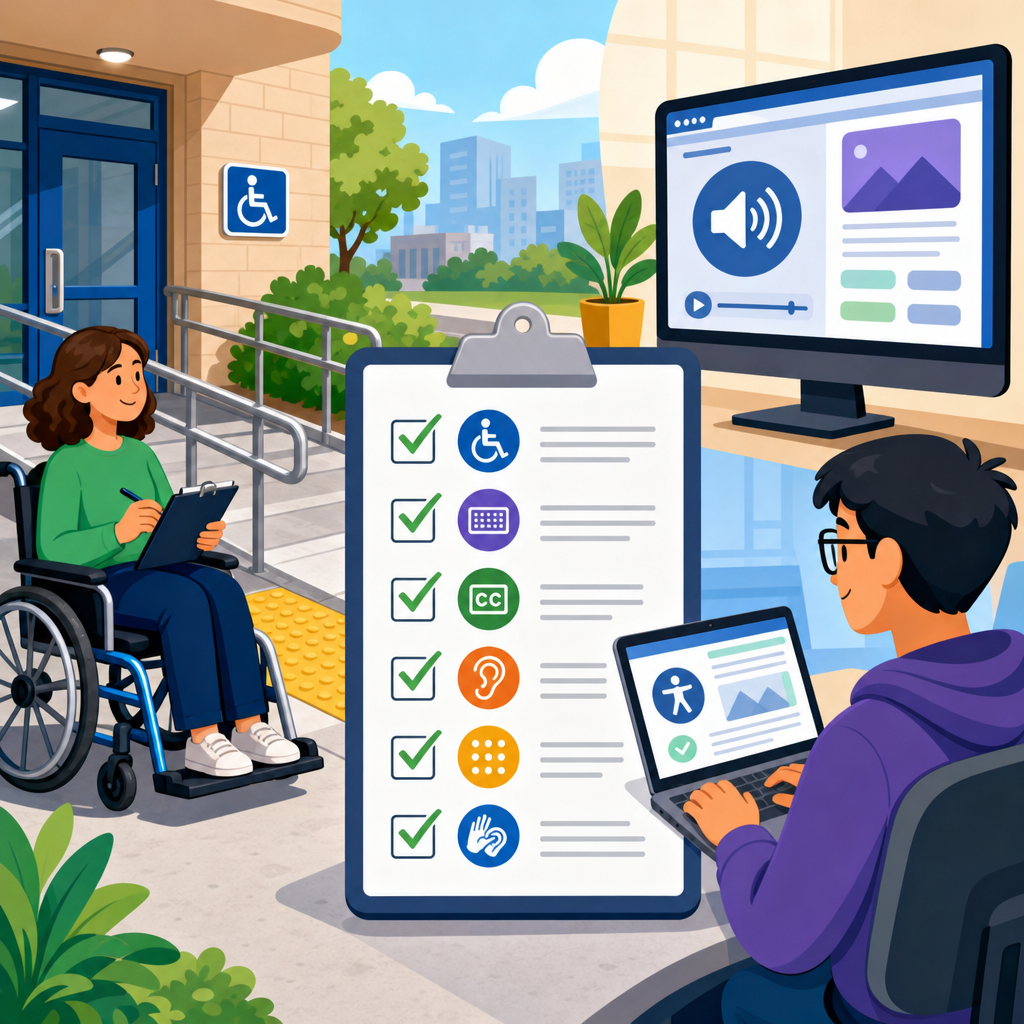
Building an ADA audit checklist for physical and digital access starts with understanding one fact: compliance is not a single inspection, but a repeatable process for finding barriers, prioritizing fixes, documenting decisions, and verifying that people with disabilities can use a space, service, or website with equal dignity and independence. An ADA audit checklist is a structured review tool used to evaluate whether facilities, customer journeys, communication methods, software, and web content align with disability access requirements and accepted technical standards. In practice, I have found that teams struggle most when they separate physical compliance from digital compliance, because users do not experience an organization in silos. A customer may park in a lot, enter a lobby, scan a QR code, complete a mobile form, receive a PDF, and speak with staff in one continuous experience. If any step breaks, access breaks.
The Americans with Disabilities Act sets the legal foundation, while related standards and guidance shape implementation. For built environments, the 2010 ADA Standards for Accessible Design define many scoping and technical requirements, including routes, doors, restrooms, signage, and service counters. For digital access, organizations commonly audit against the Web Content Accessibility Guidelines, especially WCAG 2.1 Level AA, because it provides specific, testable success criteria used across settlements, procurement standards, and internal policies. Section 508 also matters for public-sector and contractor contexts. A practical ADA audit checklist brings those frameworks into one operational document, so compliance teams, facilities managers, developers, designers, procurement leads, and front-line staff can work from the same playbook.
This matters for legal risk, customer experience, operational efficiency, and brand trust. It also matters because retrofits are almost always more expensive than accessible planning. A good checklist answers direct questions: What should we inspect? Who owns remediation? How do we score severity? What evidence should we keep? How often should we re-audit? The strongest hub article on practical implementation of ADA compliance should do more than define terms. It should show how to build a checklist that works in the field, on a website, and across policy, training, procurement, and continuous monitoring.
Start with scope, standards, and user journeys
The first step in building an ADA audit checklist is setting the scope. Many failed audits happen because the review begins with a generic template instead of a defined inventory. List every physical site, entrance, public area, program area, digital property, document type, and customer transaction. Include leased spaces, kiosks, mobile apps, PDFs, booking engines, video players, chat tools, and third-party platforms that customers must use. Then map the most important user journeys. For example, a patient journey might include parking, curb access, automatic doors, reception, forms, exam room navigation, after-visit summaries, payment portal access, and telehealth instructions. A retail journey may include store entry, fitting rooms, point of sale, loyalty signup, ecommerce browsing, checkout, and support chat.
Once scope is defined, assign the standards that apply to each asset. For physical spaces, use the ADA Standards, plus state and local building code requirements where they exceed federal minimums. For digital products, use WCAG 2.1 AA as your baseline unless your policy has moved to WCAG 2.2 AA. If you handle PDFs, include PDF/UA practices and document accessibility checks. If video is in scope, require captions, audio description analysis where needed, and accessible player controls. I recommend creating one master checklist with separate sections for physical access, digital access, communication access, and governance. That structure reflects how organizations operate while still supporting one shared remediation program.
Build the physical access portion of the checklist
A physical ADA audit checklist should follow the path a visitor takes. Begin outside the property. Review parking count, location, signage, surface condition, cross slopes, access aisles, curb ramps, passenger loading zones, and route continuity from parking to the accessible entrance. Measure rather than estimate. Teams often miss noncompliance because they rely on visual impressions instead of dimensions and slope readings. Essential tools include a tape measure, digital level, door force gauge where relevant, camera, and annotation software for floor plans and photos.
Continue with entrances and circulation. Check door width, threshold height, maneuvering clearances, opening hardware, opening force where applicable, vestibule spacing, and whether at least one accessible entrance is open during business hours. Inside, evaluate accessible routes, elevator access, protruding objects, flooring transitions, queue lines, seating distribution, counters, drinking fountains, alarms, and signage. Restrooms deserve their own checklist section covering clear floor space, turning radius, grab bars, lavatory knee clearance, accessories, dispensers, mirror height, stall configuration, and door swing conflicts. In service settings, also review exam tables, fitting rooms, sales counters, self-service kiosks, assistive listening systems, and emergency egress procedures.
Train auditors to record the exact barrier, location, standard reference, photo evidence, and likely remediation path. “Main entrance noncompliant” is not actionable. “North lobby pull-side maneuvering clearance blocked by planter; relocate planter and repaint queue line” is actionable. That level of specificity reduces disputes between facilities, legal, and operations teams and speeds budget approval.
Create the digital access portion with testable criteria
A digital ADA audit checklist should be organized around the actual components people use, not only around abstract guidelines. Start with core pages and templates: home, category, product or service pages, forms, checkout, account area, search, location pages, PDFs, videos, and support content. Then test repeated interface patterns such as navigation menus, modals, accordions, sliders, sortable tables, alerts, and error messages. The checklist should translate WCAG requirements into plain-language tests. For example: Can every function be completed with a keyboard alone? Does visible focus remain clear at each step? Do images that convey information have accurate alternative text? Are form fields programmatically labeled, with errors identified in text and linked to the relevant fields? Does color convey meaning by itself, or is there a second cue?
Use both automated and manual testing. Automated tools such as axe DevTools, WAVE, Lighthouse, and Siteimprove catch missing labels, color contrast issues, and structural errors quickly, but they do not tell you whether alternative text is meaningful, whether focus order matches visual order, or whether a screen reader user can understand a complex checkout flow. Manual testing should include keyboard-only review, zoom and reflow checks, screen reader spot checks with NVDA, JAWS, or VoiceOver, and mobile testing with native accessibility settings. In my experience, the most expensive digital failures come from custom widgets and embedded third-party tools, especially booking calendars, payment modules, maps, and document viewers. Put those components high on the checklist because they often control the most business-critical tasks.
Use a severity model and ownership matrix
An audit checklist becomes operational only when it helps teams prioritize. I recommend rating each finding by user impact, frequency, legal exposure, and remediation complexity. Critical issues block a core task, such as entering the building, submitting a required form, or completing a purchase. High issues create substantial difficulty but may have a workaround. Moderate issues reduce usability or independence. Low issues are real but less urgent. Add owner, due date, status, and validation fields. Facilities might own striping, signage, door hardware, and restroom accessories. Product teams may own form fields, focus management, and semantic markup. Procurement may own vendor remediation timelines. HR or training teams may own staff communication protocols and accommodation procedures.
| Checklist Area | Example Finding | Severity | Typical Owner | Evidence to Keep |
|---|---|---|---|---|
| Parking and route | Access aisle lacks required markings | High | Facilities | Photos, measurements, work order |
| Entrance | Accessible entrance locked during posted hours | Critical | Operations | Observation log, policy update |
| Website navigation | Keyboard focus trapped in menu | Critical | Engineering | Bug ticket, test video, retest notes |
| Forms | Error messages not announced to screen readers | High | Engineering | Screen reader test notes, release record |
| Documents | PDF lacks reading order and tagged headings | Moderate | Content team | Remediated file, accessibility report |
This structure turns an ADA audit checklist into a management tool instead of a static spreadsheet. It also supports internal linking across your compliance program: remediation workflows, vendor management, accessible design standards, and training requirements all connect back to this hub.
Include communication, policy, and staff procedures
Practical implementation of ADA compliance is not limited to ramps and code. Many access failures happen through communication. Your checklist should ask whether staff know how to provide auxiliary aids and services, how to respond to accommodation requests, and how to offer equivalent service when a feature is temporarily unavailable. Review captioning practices, relay call handling, accessible event registration, interpreter request workflows, accessible document production, and alternate-format availability. If your organization publishes notices, menus, forms, handbooks, or emergency instructions, add them to the checklist inventory.
Policy controls matter because they prevent recurring violations. Confirm that accessibility requirements appear in design standards, procurement contracts, QA definitions, publishing workflows, and change management. For example, if a marketing team can upload a promotional PDF without any accessibility checkpoint, the same error will repeat every month. If a facilities team can renovate a restroom without reviewing clearances against the ADA Standards, barriers will be built back in. I have seen organizations make fast progress only after they embedded accessibility into intake forms, sprint acceptance criteria, lease language, and maintenance schedules.
Document findings, validate fixes, and set an audit cadence
The best ADA audit checklist includes documentation rules from the start. For each finding, keep the date, auditor, asset, exact location, standard reference, description, photos or screen captures, measurements, user impact summary, and recommended remediation. Store everything in a system your teams already use, such as Jira, Asana, ServiceNow, Archer, or a dedicated compliance tracker. Version control matters. If a standard changes, or if a property is renovated, you need to know which checklist version was used and what was verified at that time.
Validation is a separate step, not a box checked by the same person who implemented the fix. Re-test completed work against the original issue and the broader user flow. A repaired curb ramp still fails if the route to the door is blocked. A fixed form label still fails if the submit error summary does not move focus. Establish a cadence based on change frequency and risk. High-change websites may need automated scanning weekly, manual audits quarterly, and major-flow reviews before every release. Physical sites often need annual audits, plus event-driven reviews after renovations, relocations, or complaints. The goal is continuous access, not one-time certification.
Common mistakes and how to avoid them
The most common mistake is treating accessibility as a checklist-only exercise without involving disabled users. A strong audit checklist is necessary, but it should be paired with usability testing, complaint review, and frontline feedback. Another mistake is auditing only public webpages while ignoring authenticated areas, PDFs, emails, kiosks, and embedded tools. On the physical side, teams often inspect dimensions but ignore operations, such as inaccessible entrances being used for deliveries, furniture blocking routes, or staff moving chairs into required clearances. A third mistake is closing findings too early. If a vendor says an issue is fixed, verify it independently.
Avoid broad statements like “ADA compliant website” or “fully accessible facility.” Accessibility is maintained through governance, testing, and remediation, not guaranteed forever. The better approach is to maintain a documented program, publish a clear accessibility contact method, respond promptly to reports, and show measurable progress over time.
A well-built ADA audit checklist for physical and digital access gives organizations a single operating framework for practical implementation of ADA compliance. It connects legal standards to everyday decisions, from parking layout and restroom accessories to navigation menus, PDFs, captions, and staff procedures. The key is to define scope carefully, align each asset to the right standards, test real user journeys, assign ownership, rate severity, and verify every fix with evidence. When done properly, the checklist becomes more than an audit form. It becomes the backbone of budgeting, design review, vendor accountability, and continuous improvement.
The main benefit is consistency. Instead of reacting to complaints one by one, your team can find barriers systematically, prioritize what matters most, and reduce both user friction and legal exposure. Start by inventorying your physical and digital touchpoints, build one shared checklist with measurable criteria, and schedule your first baseline audit. That first pass will show you where access breaks today and where a stronger compliance program needs to begin.
Frequently Asked Questions
What should be included in an ADA audit checklist for both physical and digital access?
An effective ADA audit checklist should cover every point where a person interacts with your organization, not just obvious architectural features or website templates. On the physical side, the checklist should review parking, routes from public sidewalks and transit stops, entrances, door hardware, reception areas, service counters, restrooms, elevators, interior circulation paths, signage, lighting, alarms, seating, and emergency procedures. It should also examine whether policies and staff practices support accessibility, because a compliant building can still create barriers if employees do not know how to assist customers with disabilities appropriately.
On the digital side, the checklist should evaluate websites, mobile experiences, online forms, PDFs, videos, kiosks, software platforms, email communications, and any customer-facing or employee-facing technology. Core review areas typically include keyboard navigation, screen reader compatibility, color contrast, text alternatives for images, headings and page structure, link clarity, form labels, error messaging, captions, transcripts, focus indicators, zoom and reflow, time limits, and accessible document formatting. It is also important to include communication access items such as alternative formats, relay options, captioned media, and processes for handling accommodation requests. A strong checklist does not stop at identifying standards; it connects each item to real user tasks so you can verify whether people with disabilities can complete essential actions independently and with dignity.
How do you prioritize issues once barriers are identified during an ADA audit?
The most practical way to prioritize ADA findings is to rank issues by impact, frequency, legal risk, and feasibility. Start with barriers that completely block access to core services, such as an inaccessible entrance, a missing accessible restroom on a public floor, a checkout form that cannot be completed by keyboard users, or a video without captions that delivers essential information. These are high-priority problems because they prevent equal participation and can expose the organization to immediate operational and legal consequences.
Next, separate findings into tiers. A common approach is to classify issues as critical, high, medium, or low. Critical items stop a user from completing a primary task or entering a space. High-priority items create major difficulty or force a person to rely on assistance. Medium items reduce usability or independence but may have workarounds. Low-priority items are still worth fixing, but they do not carry the same urgency. Each issue should also include the relevant location, the affected disability group or user need, the standard or guideline involved, the recommended fix, the owner responsible, the estimated effort, and a target completion date. This turns the audit from a static report into an action plan. The best prioritization systems balance technical compliance with real-world experience, ensuring that the most meaningful barriers are addressed first rather than simply checking off the easiest repairs.
How often should an organization update and repeat its ADA audit checklist?
An ADA audit checklist should be treated as a living operational tool rather than a one-time project document. At a minimum, organizations should review and update the checklist annually, but many should revisit it more often based on changes in facilities, technology, content, staffing, or services. For example, a website that is updated weekly, a property undergoing renovation, or a business launching a new app or self-service kiosk may require quarterly or even continuous review. The right frequency depends on how often the user experience changes and how much risk is tied to inaccessibility.
It is also wise to trigger a new review whenever major events occur. Examples include redesigning a website, remodeling a lobby, changing reservation or checkout systems, adopting new software, publishing a large batch of documents, or receiving an accessibility complaint. Repeating the checklist on a schedule helps verify that completed fixes remain effective and that new barriers have not been introduced. Over time, this process creates a documented record of due diligence, including identified issues, remediation steps, testing results, policy updates, and staff training efforts. That documentation is valuable not only for compliance management, but also for improving accountability across departments. In practice, the strongest organizations build accessibility checks into procurement, design, publishing, maintenance, and quality assurance so that the checklist becomes part of everyday operations.
Who should be involved in creating and using an ADA audit checklist?
Creating a useful ADA audit checklist is rarely a one-person task. The most reliable results come from a cross-functional team that combines legal awareness, technical knowledge, operational insight, and lived experience. For physical access, facilities leaders, property managers, architects, contractors, safety personnel, and front-line staff often need to participate. For digital access, the team may include web developers, UX designers, content editors, document creators, QA testers, product managers, IT leaders, procurement staff, and customer support personnel. Human resources, communications, and training teams may also play an important role, especially when the checklist includes employment processes or internal systems.
Just as important, the process should include input from people with disabilities, whether through employee resource groups, user testing, advisory panels, consultants, or community members. Standards and measurements are essential, but they do not always reveal how a space or interface actually feels in use. Someone may technically reach a service counter yet still find the interaction awkward, confusing, or dependent on assistance. Involving disabled users helps organizations identify these practical gaps early. Ownership matters too: each checklist section should have a clearly assigned responsible party, along with a process for escalation, budgeting, and follow-up verification. When accessibility is shared across departments but governed through clear accountability, the checklist becomes much more than a compliance form—it becomes a tool for consistent decision-making and better service delivery.
How can an ADA audit checklist help reduce legal risk while improving user experience?
An ADA audit checklist helps reduce legal risk because it creates a structured method for identifying and correcting barriers before they become complaints, disrupted transactions, or formal claims. Rather than reacting only after a problem is reported, the organization can show that it has an ongoing process for reviewing access, assigning remediation, documenting decisions, and verifying outcomes. That record matters. If a business can demonstrate regular inspections, prioritized repairs, policy reviews, staff training, and follow-up testing, it is in a far stronger position than one with no system at all. A checklist also helps uncover gaps that are easy to miss when responsibility is spread across departments, such as inaccessible PDFs, inconsistent signage, poor communication procedures, or online forms that fail for assistive technology users.
At the same time, the checklist improves user experience because accessibility and usability often support each other. Clear navigation, readable text, logical layouts, better captions, accessible entrances, easier wayfinding, and more predictable service interactions benefit many users, not just people with disabilities. The result can be smoother customer journeys, fewer abandoned transactions, stronger trust, and less dependence on ad hoc accommodations. Importantly, the checklist should not be framed only as a defensive legal tool. Its real value is that it helps organizations design for equal access from the start, making it easier for more people to use spaces, services, and digital content independently. That broader perspective leads to better operational quality, stronger reputation, and more sustainable compliance over time.