Door maneuvering clearance determines whether a person using a wheelchair, scooter, walker, cane, or even a delivery cart can approach a door, operate hardware, and pass through without unsafe backing, twisting, or repeated repositioning. In ADA accessibility standards, the distinction between pull side and push side is critical because the space needed to open a swinging door changes depending on whether the user must pull the leaf toward the body or push it away. I have reviewed plans, measured existing entrances, and worked through field corrections where a door technically met clear width but still failed in use because maneuvering clearance was ignored. This article explains accessible routes, doors, and entrances as a connected system, then focuses on how pull side versus push side clearances work, when they apply, and where projects commonly go wrong.
An accessible route is the continuous, unobstructed path connecting site arrival points, entrances, interior spaces, and elements such as toilet rooms, service counters, and exits. Doors and entrances are the control points along that route. If the route reaches a doorway that lacks proper clear floor space, compliant hardware, threshold conditions, or opening force, the route breaks down in practice. That is why door maneuvering clearance matters beyond a single detail. It affects school entries, apartment common areas, clinics, offices, restaurants, and retail shops. It also matters during renovations, where existing walls, sidelights, closers, and security vestibules often create conflicts that are not obvious on paper but become immediate barriers in the field.
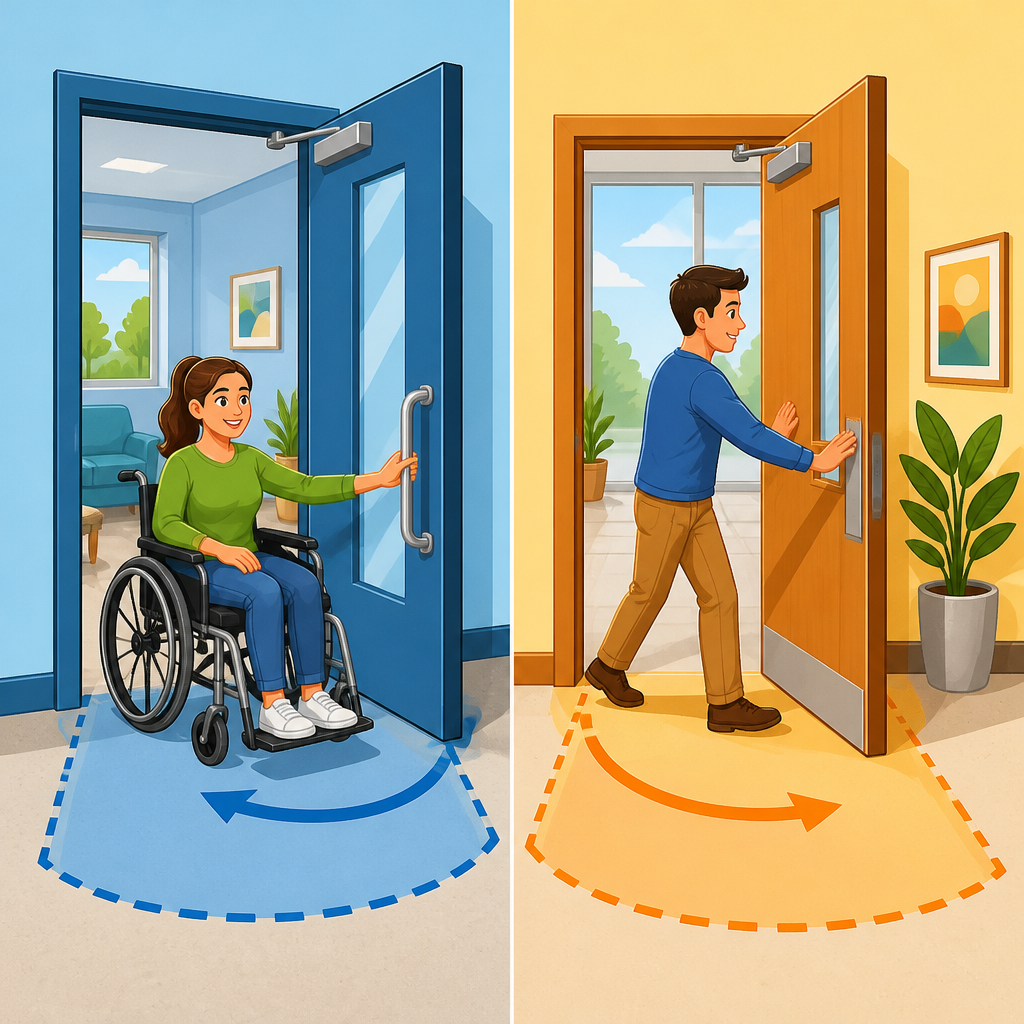
At a basic level, maneuvering clearance is the floor area at the latch side and approach side of a door that allows a user to reach the handle, open the door, and move through. Pull side means the door opens toward the user. Push side means the door swings away. Pull side usually requires more space because the person must get close enough to operate the hardware while leaving room to move backward or sideways as the door leaf swings out. Push side generally needs less depth, but latch-side clearance is still important, especially when a closer and latch are present. The exact dimensions depend on direction of approach, whether the door has both a closer and latch, and whether the approach is front, hinge side, or latch side.
This hub covers the full topic of accessible routes, doors, and entrances so it can anchor more detailed pages on clear width, thresholds, hardware, vestibules, and automatic operators. If you are designing a new entrance, reviewing an ADA survey, or troubleshooting a failed inspection, understanding the relationship between route continuity and door maneuvering clearances will save time and costly rework.
How accessible routes, doors, and entrances work together
Accessible routes begin long before the doorway. They start at parking, public sidewalks, passenger loading zones, or transit stops and continue to an accessible entrance. From there, they connect primary interior functions. On plans, I check route width, slope, cross slope, level changes, protruding objects, and turning space before I ever verify a door swing. A compliant door in a noncompliant route does not fix the user experience. For example, a medical office may provide a power-assisted entrance door, but if the vestibule beyond it is too tight for a wheelchair to align with the next pull-side door, the sequence still fails.
Entrances also involve choices about which doors must be accessible. Not every entrance in every building must serve as an accessible entrance, but required accessible entrances must connect to the accessible route and remain usable during normal business operations. Common failures include locking the powered operator door after hours while leaving only a heavy manual door available, or routing disabled visitors to a side entrance through service areas. Accessible design is not just geometric compliance; it is an operational commitment to equivalent access.
Within this system, doors have several core requirements: clear opening width, maneuvering clearance, threshold limits, hardware operability, opening force, closing speed, and surface conditions. Door maneuvering clearance is often the hardest part to retrofit because it is controlled by adjacent walls, return panels, casework, security devices, and vestibule depth. A pair of doors can meet nominal leaf sizes and still be unusable if someone cannot position on the latch side to pull one leaf open. That is why this dimension deserves close attention early in design.
What pull side and push side actually mean
Pull side and push side are not code jargon for left hand or right hand. They describe the user’s relationship to the door swing from the approach side. If the door opens toward the approaching person, that side is the pull side. If it opens away, that side is the push side. The ADA Standards assign different maneuvering clearances because body movement changes with the swing. On the pull side, the user must often grasp hardware, pull the leaf clear, reverse direction slightly, and move through while avoiding the sweeping arc. On the push side, the user can generally move forward as the door opens away, so depth can be less.
The latch side is equally important. It is the area beside the latch edge that allows access to hardware. Without enough latch-side clearance, a wheelchair user may be forced to approach too close to the handle, making it difficult to pull the door while backing up. In field reviews, this is one of the most frequent failures at restroom entries, office suite doors, and apartment common room doors. Designers sometimes center a door in a narrow alcove because it looks balanced, but symmetry can eliminate the side space needed for actual use.
Another point that often confuses teams is the role of closers and latches. Doors with both a closer and latch usually require more maneuvering clearance than doors without those features because the user must overcome closing resistance and ensure the latch clears the strike. Many exterior and rated corridor doors include both. Interior doors without closers can sometimes use reduced dimensions, but assumptions are risky. Always verify the exact condition rather than applying a generic rule.
Key maneuvering clearance conditions and dimensions
The most cited condition is a front approach on the pull side of a door with both closer and latch. In that case, the ADA Standards require 60 inches minimum perpendicular to the doorway and 18 inches minimum beyond the latch side. This is the classic condition at many suite entries and restroom doors. The 60-inch depth gives room to approach and pull the door without the footrests or mobility device getting trapped by the swing. The 18-inch latch-side dimension allows a side reach to hardware while maintaining turning leverage.
For a front approach on the push side with both closer and latch, the required depth is typically 48 inches with 12 inches of latch-side clearance. Where there is no closer and no latch, push-side latch clearance can be reduced. Hinge-side and latch-side approaches have their own requirements as well. These variations matter because a corridor door approached from the side behaves differently than an entry door approached head-on. In renovation work, I often sketch the actual approach path, not just the door rectangle, because the approach geometry determines which dimensional box applies.
| Approach condition | Typical minimum depth | Typical latch-side clearance | Why it matters |
|---|---|---|---|
| Front approach, pull side, closer and latch | 60 inches | 18 inches | Allows user to pull door and back clear of swing |
| Front approach, push side, closer and latch | 48 inches | 12 inches | Provides room to reach hardware and move forward through opening |
| Parallel approach, latch side, pull side | 60 inches | 24 inches | Supports side positioning where front alignment is limited |
| Parallel approach, hinge side, push side | 54 inches | 42 inches | Accommodates approach along wall and door swing away from user |
These values are the dimensions many practitioners use most often, but they are not a substitute for consulting the applicable standard and figure for the exact approach. State codes can also coordinate with or build on federal accessibility rules, and project type matters. Schools, healthcare buildings, multifamily common areas, and government facilities may trigger overlapping reviews. The safest practice is to confirm the governing edition, identify the exact approach direction, and then dimension the surrounding floor area so trim, guards, casework, or security equipment do not intrude into the required space.
Common design mistakes on accessible doors and entrances
The most common mistake is treating clear width as the only important number. Teams will specify a 36-inch door and assume compliance, even though a return wall at the latch side leaves only six inches of maneuvering room. Another frequent problem is the shallow vestibule. Two doors in series may individually comply, yet the space between them does not allow a wheelchair user to clear one door before reaching the swing of the other. Vestibule design should account for door swing, closer speed, weather protection, and queuing, not just nominal plan dimensions.
Hardware selection creates another layer of failure. Round doorknobs, tight grasping requirements, and high mounting locations can make an otherwise compliant clearance unusable. Lever hardware, operable with one hand and without tight grasping, pinching, or twisting, is the standard expectation. Closing force and opening force matter too. A door with perfect maneuvering clearance can still be inaccessible if a closer is over-sprung or if wind pressure at an exterior entry makes the leaf too heavy to control. I routinely see this after contractor adjustments intended to solve latching problems.
Thresholds and level changes are also underappreciated. If the threshold is too high or the floor surface immediately inside the door is beveled incorrectly, users may lose momentum exactly where precise positioning is required. The result is a door that meets several isolated criteria but functions poorly as a sequence. Good accessible entrance design works because each detail supports the next one.
Applying the rules in real buildings and renovations
In new construction, the best approach is to plan door maneuvering clearance at schematic design, before wall locations harden. Shifting a door a few inches off center, increasing a vestibule by one module, or reversing a swing can resolve conflicts cheaply on paper. In existing buildings, tradeoffs are more constrained. Masonry piers, structural columns, and legacy storefront framing often limit what can move. That is where options such as automatic operators, hold-open devices tied to fire alarm systems, offset pivots, or reconfigured partitions become practical accessibility tools rather than luxury upgrades.
Consider a small restaurant renovating its toilet rooms. The owner may focus on fixture clearances, yet the actual barrier is the inward-swinging restroom door with inadequate pull-side clearance in the corridor. If there is no room to enlarge the corridor, changing the swing direction or installing an automatic operator may solve the problem more effectively than rebuilding the room interior. In a multifamily lobby, relocating package lockers can restore the 18 inches needed at the latch side of an entry door without touching the rated partition. These are typical field solutions because maneuvering clearance problems are usually about adjacent elements, not just the door itself.
Documentation matters. Accessible routes, doors, and entrances should be dimensioned clearly on plans, enlarged plans, and door schedules. Notes should identify automatic operator locations, clear floor spaces, threshold details, and any coordination required with security hardware or access control. When these items are left to interpretation, the site often ends up with readers, strikes, or guards installed directly in required maneuvering space.
How this hub supports the broader ADA accessibility standards topic
As a sub-pillar page, this article connects the full set of issues that shape accessible routes, doors, and entrances. A complete compliance review usually branches into related topics: door clear opening width, threshold height and bevel, door hardware and mounting heights, opening force and closer adjustment, vestibule sizing, automatic door operators, gate and turnstile alternatives, and accessible entrance signage. Each of those deserves a dedicated article, but maneuvering clearance is the concept that ties them together because it translates technical dimensions into actual usability at the doorway.
The practical takeaway is straightforward. Measure the approach, identify whether the user is on the pull side or push side, verify latch-side clearance, and review the entire route sequence before and after the door. If one element fails, the route fails. That principle is why inspectors, architects, facility managers, and business owners should treat door maneuvering clearance as a first-order accessibility issue, not a drafting afterthought.
Use this page as your starting point for every review of accessible routes, doors, and entrances. Then move deeper into the linked subtopics for detailed dimensions, exceptions, and retrofit strategies specific to your project type. Getting pull side versus push side right leads to safer entries, smoother circulation, fewer correction notices, and a building people can actually use with dignity and independence.
Frequently Asked Questions
What is the difference between pull-side and push-side maneuvering clearance at a door?
Pull-side and push-side maneuvering clearance refer to the amount of floor space available on each side of a swinging door so a person can approach the door, operate the hardware, and move through the opening safely. The distinction matters because opening a door toward your body is mechanically different from pushing it away. On the pull side, a user typically needs enough space to approach the latch side, reach the hardware, pull the door open, and then move out of the door’s path without backing up excessively or getting trapped behind the swinging leaf. That usually requires more coordination and more usable space.
On the push side, the maneuver is often simpler because the door swings away from the user. Even so, adequate clearance is still necessary so the person can get close enough to the hardware, activate it, and continue forward through the opening without awkward turning or repeated repositioning. In practical terms, designers, inspectors, and contractors must evaluate not just the door opening width, but also the clear floor space beside and in front of the door, the direction of travel, the approach angle, the presence of a closer or latch, and whether the hardware can be used with limited strength or dexterity. If the maneuvering space is wrong for the side being approached, a door that looks compliant on paper can be frustrating or unusable in real life.
Why does the pull side usually require more clearance than the push side?
The pull side usually requires more clearance because the user must perform more actions in less forgiving body positions. A person using a wheelchair, scooter, walker, or cane often cannot simply stand in front of the door and yank it open. Instead, they need room to approach the latch side, reach the handle or lever, pull the leaf toward themselves, and then pivot or roll through while keeping clear of the door swing. That sequence takes space, especially when mobility devices limit tight turns or quick backward movement.
Think of it this way: when a door swings toward the user, the door itself temporarily occupies the same area the user may need for balance, hand positioning, and movement. If there is not enough latch-side clearance or front approach depth, the person may have to back up repeatedly, twist awkwardly, or let go of the hardware at the wrong moment. Those extra movements can create safety risks and make the doorway far more difficult than intended. By contrast, on the push side, once the hardware is operated, the door moves away, which generally allows a more direct path of travel. That is why pull-side dimensions are often more demanding and why the side of approach should always be evaluated carefully during design review and field measurement.
What factors affect how much maneuvering clearance a door needs under accessibility standards?
Several factors influence required maneuvering clearance, and this is where many plan reviews and field conditions become more complicated than they first appear. The main variables include whether the approach is from the pull side or push side, whether the approach is straight-on or from a latch-side angle, whether the door has both a closer and a latch, the swing direction, and the type of hardware installed. Each of these changes how a person positions their body or mobility device before, during, and after operating the door.
Door closers and latches are especially important because they add resistance and timing pressure. A self-closing, latched door generally demands more precise control than a free-swinging, unlatched door. Wall conditions near the latch side also matter. If a return wall, casework, or another obstruction crowds the approach, the user may lose the side clearance needed to line up properly with the hardware. Floor levelness, door pressure, thresholds, and nearby protrusions can also affect usability, even if the nominal dimensions seem correct. In real projects, the best evaluations consider the entire maneuvering sequence rather than isolated measurements. That means checking the clear width, the floor space, the hardware location, the swing path, and any surrounding architectural features that could interfere with a smooth accessible approach.
Can a door meet the opening width requirement and still fail maneuvering clearance requirements?
Yes, absolutely. This is one of the most common accessibility issues in both new construction and renovations. A door may provide the minimum required clear opening width and still be difficult or impossible for many users if the maneuvering clearance is inadequate. Width alone only tells you whether there is enough passage space once the door is open. It does not tell you whether a person can actually get the door open in the first place.
For example, a compliant clear opening can still be functionally inaccessible if there is not enough latch-side space on the pull side, if a corridor is too narrow for proper approach, if a closer makes the door too hard to control, or if a perpendicular wall blocks access to the hardware. In those cases, the problem is not the size of the opening itself but the lack of usable floor area to perform the door-opening maneuver. This is why experienced reviewers do not stop at checking door width. They study approach conditions, side clearances, hardware usability, and the actual path a wheelchair user or someone with limited balance would follow. A doorway is only truly accessible when the entire operation—from approach to passage—is workable and safe.
What are the most common design and construction mistakes that cause maneuvering clearance problems?
Some of the most common mistakes come from focusing too narrowly on the door schedule and not enough on the surrounding layout. A frequent problem is placing a door too close to an adjacent wall, corner, cabinet, or return partition, which reduces the required latch-side clearance. Another common issue is forgetting that the clearance requirements change depending on whether the user is approaching from the push side or pull side. Teams sometimes assume the same space works for both, but the needed geometry can be very different.
Other recurring mistakes include adding closers or latching hardware late in the project without revisiting the maneuvering clearance implications, installing thresholds or floor transitions that interfere with mobility devices, and allowing furniture, dispensers, millwork, or equipment to encroach into the required clear floor space. Vestibules are another trouble spot because two swinging doors placed too close together can make it impossible for a wheelchair user to operate one door and then position properly for the next. In renovations, field conditions often differ from drawings, so a doorway that looked acceptable during design may fail once frames, walls, hardware, and finishes are installed. The best way to avoid these problems is to review door maneuvering space early, verify dimensions in the field, and evaluate each opening as a complete user experience rather than a single code checkbox.