Operable parts under Chapter 3 of the ADA Accessibility Standards are the controls people touch, push, pull, turn, or move to use a building, and their required heights, force limits, and reach ranges are foundational to accessible design. In practice, this includes light switches, door hardware, elevator buttons, thermostats, intercoms, dispensers, receptacles, and any other component that must be operated by hand. I have reviewed these elements on construction sites, in plan sets, and during post-occupancy surveys, and the same pattern appears repeatedly: small dimensional mistakes create outsized barriers for real users. Chapter 3 matters because it establishes the baseline technical criteria that determine whether a person using a wheelchair, with limited grip strength, or with one free hand can independently use a space. For architects, contractors, owners, and facility managers, understanding operable parts is not optional detail work; it is core compliance.
Within Chapter 3: Building Blocks, operable parts sit alongside clear floor space, knee and toe clearance, protruding objects, and reach ranges. Those topics work together. A thermostat mounted at the correct height can still fail if a deep counter blocks the forward reach. A lever handle with acceptable force can still be unusable if it requires tight grasping or twisting. The governing idea is usability, translated into measurable criteria. The standards generally require operable parts to be placed within accessible reach ranges, to be operable with one hand, and to avoid tight grasping, pinching, or twisting of the wrist. In many cases, operation force is capped at five pounds maximum. These criteria are simple to state, but field conditions make them nuanced, especially when millwork depths, obstructions, hardware selection, and mounting conventions vary across trades.
This hub article explains how Chapter 3 addresses heights, force, and reach, and how those rules affect common building elements. It also connects the technical dimensions to design decisions, inspection checkpoints, and recurring failure points. If you are building out an ADA accessibility standards knowledge base, this page should function as the central reference for the subtopic because it frames the major questions practitioners ask: What counts as an operable part? How high can it be mounted? How much force is allowed? What reach rules apply when there is an obstruction? And how do you check compliance before the punch list becomes a dispute?
What Chapter 3 Means by Operable Parts
An operable part is any component used to activate, deactivate, adjust, or control a building feature. Section 309 is the core provision most teams rely on when evaluating these elements. In plain terms, if a person must manipulate something to make the building function, that component is usually an operable part. Examples include card readers at secure entries, push plates on automatic doors, sink faucet controls, emergency call buttons, accessible room signage buttons in elevators, alarm silence switches where provided for user interaction, and paper towel dispensers that require manual activation. Not every mounted item is an operable part; a fixed sign is not. But the boundary is broad enough that many coordination issues arise because one trade assumes another has checked compliance.
The baseline requirement is functional independence. Controls must be within reach, usable with one hand, and operable without motions that exclude people with limited dexterity. Lever handles comply more reliably than round knobs because knobs often require twisting and stronger grip. Large rocker switches are generally easier to use than small toggle switches. Touch controls can help, but only when they are located within reach and provide usable feedback. In the field, I see teams focus on whether a product is marketed as accessible instead of verifying the actual installed condition. Compliance is determined by the installed height, surrounding obstructions, required force, and method of operation, not by a catalog label alone.
Mounting Heights and Reach Ranges
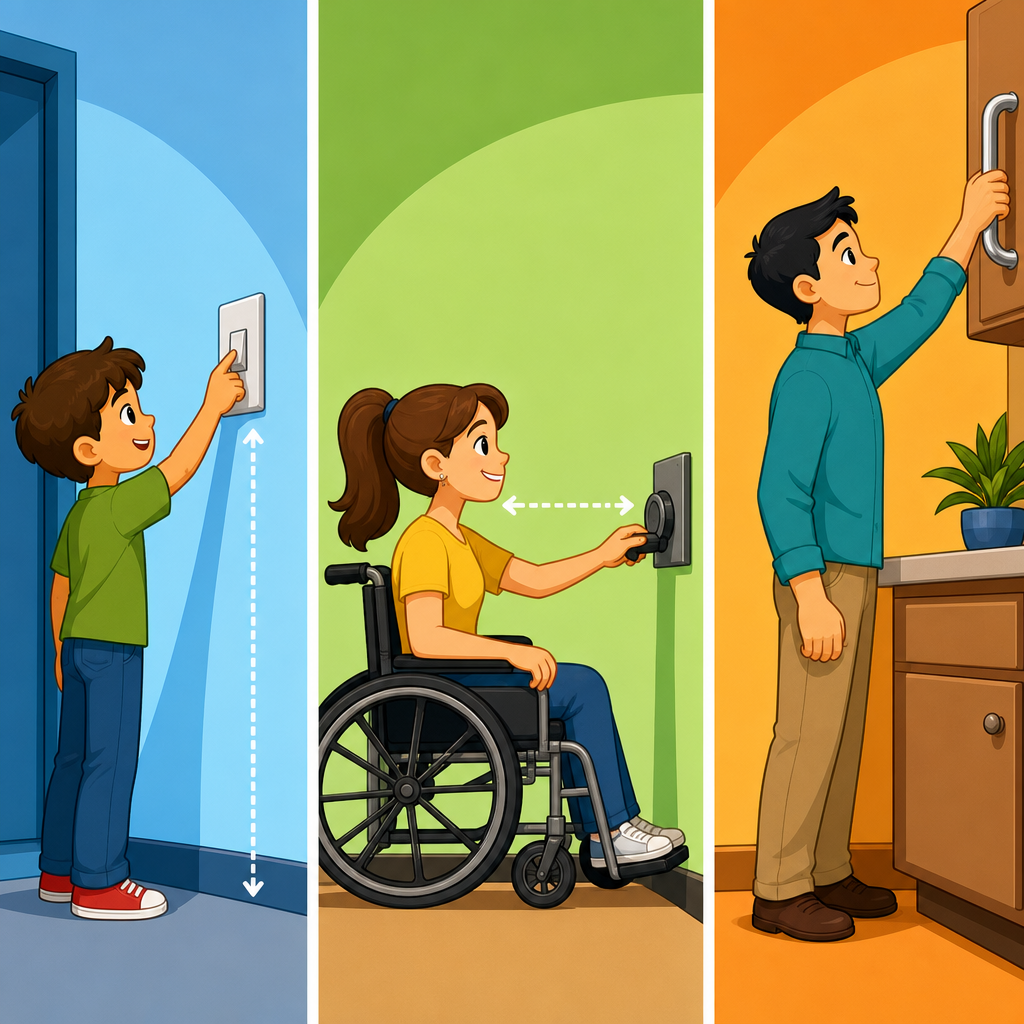
Height is not a single universal dimension. Chapter 3 ties operable-part placement to reach range rules in Section 308. For an unobstructed forward or side reach, the typical high reach limit is 48 inches maximum above the finish floor, and the low reach limit is 15 inches minimum. Those numbers are familiar, but they are only the starting point. Once you add a counter, casework, or other obstruction, the rules change. If a wheelchair user must reach over an obstruction, the allowable high reach can be reduced depending on the depth. This is why a control that is technically fine on an empty wall can become noncompliant after millwork is added late in the project.
Consider a break room microwave installed above a base cabinet. Teams often measure only from the floor to the control panel and stop there. But if the front edge of the cabinet creates a forward reach over obstruction, the permitted height may drop. The same issue affects mailbox locks, intercoms at reception counters, and restroom accessories placed behind counters or lavatories. Designers should detail the accessible reach envelope on elevations, not just call out mounting heights in specifications. Contractors should verify finish-floor dimensions in the field because an inch gained in tile buildup or countertop thickness can push an operable part out of tolerance. Accessibility failures often come from stacked assumptions, not dramatic design errors.
| Condition | Common Rule | Example | Frequent Failure |
|---|---|---|---|
| Unobstructed high reach | 48 inches maximum | Wall switch on open wall | Mounted to centerline without checking control location |
| Unobstructed low reach | 15 inches minimum | Low receptacle intended for user access | Placed in baseboard zone too close to floor |
| Forward reach over obstruction | Height may reduce as depth increases | Thermostat behind counter | Counter added after permit set without revising control height |
| Side reach at obstruction | Depends on depth and approach | Security panel beside millwork | Casework or partition edge blocks access path |
Force and One-Handed Operation
Force requirements are where many product choices succeed or fail. Under Chapter 3, operable parts generally must require no more than five pounds of force to activate. That threshold is particularly important for people with arthritis, reduced hand strength, neurological conditions, or temporary injuries. A control may be within perfect reach and still be unusable if it is stiff, spring-loaded too aggressively, or requires sustained pressure. Door hardware deserves special attention because users encounter it constantly and because confusion persists between opening force, closer resistance, latch retraction, and the force needed to operate the hardware itself. These are related but distinct issues and should be measured separately.
In real projects, the five-pound requirement often becomes a problem with specialty hardware, older self-closing devices, recessed pulls, and certain plumbing controls. I have seen accessible toilet compartments fitted with latches that met security preferences but exceeded comfortable operating force. I have also seen touchscreen controls installed with protective covers that required pinching and extra pressure, effectively negating the benefit of the interface. The simplest path is usually to specify hardware and controls that are inherently low-force and intuitive, then verify them after installation with a force gauge when needed. Manufacturers may publish performance data, but field conditions, misalignment, overtightened fasteners, and installer adjustments can materially change the force a user experiences.
Grasping, Pinching, and Twisting: Why Shape Matters
The standards do not focus only on force. They also prohibit operation that requires tight grasping, pinching, or twisting of the wrist. This requirement is why shape and motion matter. A round doorknob can fail even if it turns easily because the action itself demands grip and wrist rotation. By contrast, a lever handle, paddle latch, or push-type control can usually be activated with a closed fist, forearm, or limited finger movement. Similar logic applies to faucet controls. Blade handles, lever handles, and sensor-operated fixtures often outperform small cross handles in usability, especially for users with joint pain or limited dexterity.
This is not merely a hardware preference issue; it affects safety and independence. In healthcare settings, for example, patients may use doors and plumbing controls while managing mobility aids or carrying equipment. In schools, younger students and staff with temporary injuries benefit from hardware that can be operated quickly without precision grip. In multifamily housing common areas, mail and amenity access systems should be selected with this requirement in mind because repetitive daily use amplifies even minor usability flaws. When reviewing products, ask a simple question: can this be operated with one hand, without strong grip, and without twisting the wrist? If the answer is uncertain, it is not the right product for an accessible route or accessible space.
How Reach Rules Interact with Clear Floor Space and Obstructions
Reach compliance cannot be evaluated in isolation. Chapter 3 requires the user to have an appropriate clear floor space and accessible approach to the operable part. A switch mounted at 44 inches is not accessible if a trash receptacle permanently blocks the maneuvering space. A lavatory-mounted soap dispenser may be in range, but if exposed pipes or apron details interfere with knee clearance, the user may not be able to get close enough for a forward reach. The standards assume actual access, not theoretical visibility. That is why plan review should consider mounting height, horizontal location, adjacent protrusions, and floor space as a coordinated set.
Reception counters illustrate the point well. An assistive listening control, duress button, or check-in touchscreen may be mounted within the maximum height limit, yet still fail because the accessible counter section is too narrow, decorative paneling reduces knee clearance, or queue stanchions force an angled approach that eliminates usable reach. The same pattern occurs in hotel rooms where bedside controls are mounted behind nightstands that are not shown on permit drawings. Accessibility inspections should therefore include owner-furnished equipment and operational setup, not just permanently constructed elements. Chapter 3 building blocks are easily undermined by furniture, accessories, and late-stage changes that were never coordinated against the reach envelope.
Common Operable Parts and Practical Mounting Guidance
Some controls generate repeated compliance questions because they sit at the intersection of multiple standards. Light switches are straightforward on open walls, but not when placed over casework backsplashes. Thermostats are frequently mounted by mechanical contractors using standard office conventions that ignore accessible reach. Elevator hall call buttons and in-cab controls are highly regulated and should be coordinated with elevator manufacturer shop drawings, not assumed from generic details. Restroom accessories such as hand dryers, soap dispensers, and paper towel dispensers may be operable parts, protruding objects, or both, depending on type and location. Drinking fountain bottle fillers and refrigeration controls can also trigger reach concerns when mounted above counters or alcoves.
The most reliable approach is to publish a mounting-height schedule tied to specific conditions: open wall, side wall beside casework, over obstruction, and within specialty rooms. I typically advise teams to avoid designing to the absolute maximum whenever possible. A thermostat at 46 inches provides more margin than one at 48 inches, especially if flooring thickness changes or a device faceplate shifts the operable point upward. Likewise, placing receptacles intended for user access above the minimum gives more usability to people with limited bending tolerance. Accessibility is not only about passing inspection; it is about reducing friction in everyday use. Conservative dimensions create durable compliance and better user experience.
Inspection, Documentation, and Recurring Errors
Most operable-part disputes are preventable with disciplined verification. During design, annotate the operable portion of each device, not just the box height. During construction, check dimensions from the finished floor, after final finishes are in place. During closeout, test representative controls for force and method of operation, especially specialty hardware and custom millwork integrations. Useful tools include digital levels, tape measures, force gauges, and annotated elevation checklists. Inspectors and consultants should photograph both the device and the surrounding context so that obstructions and approach conditions are documented clearly. A single frontal photo rarely tells the full accessibility story.
Recurring errors are remarkably consistent across project types. Teams measure to the centerline of a switch instead of the highest operable point. Accessories are laid out symmetrically rather than accessibly. Wall protection, chair rails, or decorative trim are added after rough-in and interfere with usable operation. Owners replace compliant lever hardware with less durable but noncompliant knobs during renovations. Another common problem is value engineering that swaps low-force hardware for cheaper alternatives without any accessibility re-review. The fix is process, not guesswork: include accessibility checkpoints in submittals, mockups, punch walks, and facilities maintenance standards. Chapter 3 is technical, but it is manageable when accountability is assigned early and checked consistently.
Operable parts under Chapter 3 are a deceptively small subject with broad impact because every accessible building relies on controls people can actually reach and use. The core requirements are clear: place operable parts within accessible reach ranges, support clear approach, limit operating force, and avoid actions that require tight grasping, pinching, or twisting of the wrist. When those rules are applied together, accessibility becomes measurable and practical rather than abstract. When they are applied piecemeal, common elements like switches, hardware, and dispensers turn into barriers.
As the hub for Chapter 3: Building Blocks, this article should guide deeper review of reach ranges, clear floor space, protruding objects, and related technical criteria that shape operable-part compliance. The main benefit of understanding this topic is simple: you can prevent expensive corrections while making buildings more independent and usable for everyone. Use this page as your starting point, then audit your details, product selections, and field conditions against these principles before the next set goes out or the next renovation begins today.
Frequently Asked Questions
What does “operable parts” mean under Chapter 3 of the ADA Accessibility Standards?
Under Chapter 3 of the ADA Accessibility Standards, operable parts are the components of a building or space that a person must touch, grasp, push, pull, turn, press, or otherwise manipulate to use the facility. This includes obvious items such as light switches, door hardware, elevator call buttons, thermostats, intercom controls, and electrical receptacles, but it also extends to dispensers, card readers, alarm controls, service windows with release hardware, and many other everyday elements. If a person has to operate it by hand in order to access, use, or control something in the environment, it should be evaluated as an operable part.
This category matters because accessibility is not limited to ramps, clearances, and toilet rooms. A space can appear compliant at first glance yet still exclude users if the controls are mounted too high, require tight grasping or twisting, or demand more force than many people can apply comfortably. In real-world reviews of plan sets and field conditions, operable parts are among the most commonly overlooked details because they are distributed throughout the project and are often assigned to multiple trades. Electrical devices, hardware sets, specialty equipment, and owner-furnished accessories may each be specified separately, but they all still need to meet the same usability requirements when installed.
The key idea is that Chapter 3 establishes baseline usability rules so that people with limited reach, reduced hand strength, arthritis, paralysis, prosthetic use, or other mobility impairments can independently operate building features. That is why the standards focus on mounting height, reach range, and the amount of force needed for operation. These requirements are foundational, and they should be addressed early in design and verified again during construction rather than treated as a final punch-list item.
What are the ADA height and reach requirements for operable parts?
The basic rule most designers and contractors rely on is that operable parts must generally be placed within accessible reach ranges, with the most common maximum height being 48 inches above the finish floor or ground for an unobstructed forward or side reach, and a common minimum height of 15 inches above the finish floor or ground. That simple rule is often a helpful starting point for many items such as switches, controls, card readers, and similar devices. However, the full analysis does not stop with the device height alone. The actual permitted reach depends on whether the approach is forward or side reach and whether there is an obstruction such as a counter, cabinet, or deep element in front of the control.
In practice, this means a control that is technically mounted at a familiar height can still fail if it is placed behind millwork, above a deep countertop, or off to the side where a wheelchair user cannot position close enough to reach it effectively. Reach range compliance is always about the relationship between the user and the operable part, not just the number shown on an elevation. On construction sites, that distinction becomes important when accessories are relocated in the field, when wall depths change, or when equipment is mounted after finish dimensions have already shifted from the original drawings.
It is also important to measure to the operable portion of the device, not simply to the rough opening, backbox, or faceplate centerline if that does not reflect the actual point a user must manipulate. For example, with a thermostat or intercom, the relevant location may be the buttons or touchscreen area. With a dispenser or specialty control, the key dimension may be the push lever or activation point. Designers should coordinate these dimensions carefully on the drawings, and inspectors should confirm final installation based on the actual usable part of the product.
How much force can operable parts require, and what kinds of motion are allowed?
Chapter 3 requires operable parts to be usable with one hand and not require tight grasping, pinching, or twisting of the wrist. In addition, the force required to activate the operable part is limited, with a common maximum of 5 pounds of force unless a different requirement applies elsewhere in the standards or under a separate referenced provision. The purpose of this rule is to ensure that people with limited dexterity, reduced grip strength, pain conditions, or neurological impairments can use controls without excessive difficulty.
This has direct implications for product selection. A round doorknob that requires twisting is a classic example of a problematic design because it depends on grip and rotation. By contrast, lever hardware, push-type controls, large rocker switches, and similarly intuitive devices are generally much better choices because they can be operated with a closed fist, the side of a hand, or limited finger motion. The same principle applies to dispensers, latches, window controls, and other building elements. A control can be within the correct height range and still be inaccessible if it demands an awkward or forceful hand movement.
Field verification is especially important here because manufacturer literature does not always reflect installed conditions. Door closers may be adjusted too aggressively, dispenser springs may be stiff, and specialty hardware may become harder to operate after installation than anticipated during submittal review. That is why accessibility reviews should include hands-on testing whenever possible. If a person has to strain, grip tightly, or use two hands to make the item work, it is a sign that the selected product or its installation may not satisfy the operable parts criteria even if the mounting height looks correct on paper.
Which building elements are most commonly missed when reviewing operable parts for compliance?
The items most often missed are not necessarily the major building systems but the dispersed, repetitive, or late-added components. Light switches and receptacles are usually considered early, but thermostats, access control readers, intercom stations, alarm acknowledge buttons, audiovisual control panels, service counters with buzz-in hardware, restroom dispensers, and equipment-specific controls are frequently overlooked. Owner-furnished or vendor-installed items are especially risky because they may fall outside the core architectural sheet set and therefore escape consistent accessibility coordination.
Another common issue is assuming that standard mounting details automatically produce compliance in every location. A switch that works well on an open corridor wall may not be compliant when installed behind a reception counter return. An elevator button panel may meet the manufacturer’s standard configuration but still require review in relation to approach clearances and user reach. A paper towel dispenser may be acceptable in one restroom but mounted too high or too far over a counter in another. Accessibility failures often result not from one dramatic error but from small location-specific decisions made during coordination, layout, and installation.
To avoid these misses, it helps to create a project-wide operable parts checklist that includes every item requiring hand use, regardless of discipline. During plan review, that means checking elevations, mounting notes, equipment schedules, and accessory details together rather than in isolation. During construction, it means confirming actual installed heights and testing operation in the field. This approach is especially valuable at project closeout, where a final accessibility walk can catch dispensers, controls, and specialty devices that were installed late and may not match the assumptions made during design.
How should designers, contractors, and inspectors evaluate operable parts during design and construction?
The best approach is to review operable parts in three stages: design, submittal coordination, and field verification. During design, identify every element a user must operate by hand and place it within the required reach range with accessible operation in mind. Do not limit the review to code summary notes. Show mounting heights clearly, call out accessible hardware types, and coordinate between architectural, electrical, plumbing, interiors, and specialty equipment scopes. This is where many problems can be prevented, especially when counters, casework, and wall protection could affect final reach conditions.
During submittal and procurement, verify that selected products truly support accessible use. Confirm that hardware can be operated without tight grasping, pinching, or twisting; check activation force where relevant; and make sure the operable portion of the product will fall within the permitted height range after installation. This stage is particularly important for products chosen by delegated designers, vendors, or owner suppliers. A compliant design intent can easily be undermined by a substituted device with a different activation point, mounting template, or operating mechanism.
In the field, measure from the finished floor to the actual operable part, account for obstructions, and physically test how the item works. If a control is behind millwork, above a deep counter, or offset in a way that limits approach, evaluate reach in real conditions rather than relying only on a nominal mounting dimension. If a dispenser, latch, or hardware set feels difficult to use, investigate whether force, adjustment, or product type is the issue. The most reliable accessibility reviews combine dimensional checks with usability testing. That is how teams move beyond theoretical compliance and make sure the built environment can actually be used independently by a wide range of people.